Last updated on July 1st, 2026 at 05:54 am
Key Highlights
- Mastering Glass Countertop photography involves understanding reflections, lighting, and composition.
- This guide unveils professional tips and techniques for capturing stunning glass countertop images.
- Learn how to manage reflections, choose the right lighting, and optimize camera settings for crystal-clear results.
- Discover the impact of backgrounds, props, and creative angles in elevating your glass countertop photography.
- These insights will help you showcase the beauty of glass countertops.
Introduction
Glass countertop bar tops add a modern look to your kitchen or bar. They are special among countertop materials because of their elegance and ability to reflect light. Taking pictures of glass surfaces can be tricky due to their shiny nature. This guide will help you learn the best ways to take great photos that show off the beauty of your glass countertops.
Enhancing Glass Countertop Photography Techniques
Photographing glass countertops well needs a good understanding of light, reflection, and composition. Glass bar tops are different from other surfaces because it reflects light in unique ways. This mix of light and transparency needs special techniques to show off the countertop’s real beauty.
Managing reflections and using the right light are very important for taking great pictures of glass countertops. By learning these techniques, you can improve your photography and show these beautiful surfaces at their best.
Understanding Glass Reflections and How to Manage Them
Reflections on glass countertops can be both tricky and exciting in photography. Knowing how to handle them is important for taking great pictures. To reduce unwanted reflections, first look at the light sources in the room. MOve your feet. Find the best place that wont require a lot of Photoshop maneuvering afterwards.
Changing your camera angle and position can greatly change the reflections. Sometimes, moving a little to the side or changing to a lower angle can help cut out distracting reflections, giving you a clearer shot. You might also want to use a polarizing filter on your lens. It can help reduce glare and make the countertop’s natural shine stand out.
Try out different angles and see how the reflections shift. At times, using reflections in a smart way can add interest and depth to your photos.
Optimal Lighting Setups for Clarity and Contrast
Good lighting is very important when taking pictures of glass countertops. It affects how clear and contrasting your photos look. Natural light is usually the best choice because it is soft and spreads evenly. But be careful, as direct sunlight can cause strong shadows and bright spots.
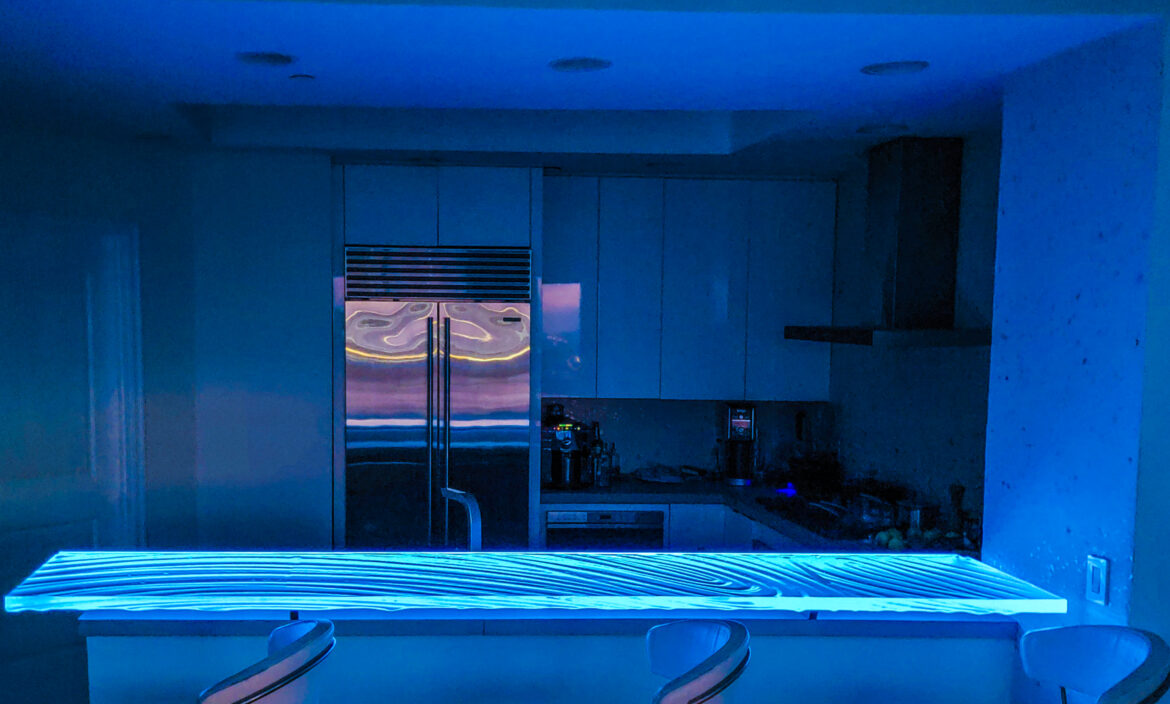
When you are inside, try mixing natural light with some artificial lighting options. Softboxes or diffusers can help make the artificial light softer, just like natural light. You can also use light strips placed under or behind the countertop. This will give a nice glow and highlight the glass’s clarity.
Glass Stair Treads are also difficult to photograph as they are typically only 12″ wide, Thus making the LED even closer to the front edge. Oftentimes we use a lower intensity setting for such skinny pieces. The camera sensor however could be saturated and you may need to change your settings to accommodate.
Choosing the Right Lenses for Glass Countertop Photos
The type of lens you choose really affects how your glass countertop looks in photos. A wide-angle lens is great for taking pictures of the whole countertop, especially in small spaces. On the other hand, a macro lens helps you zoom in on small details and textures.
Using a wider aperture makes the background blurry, so the countertop stands out more. However, a narrower aperture keeps more of the scene in focus, so both the countertop and its background are clear.
You should also think about how the lens might change what you see. Some wide-angle lenses can bend straight lines. This can make it hard to show off the clean lines of a modern glass countertop.
Camera Settings for High-Quality Glass Countertop Images
Camera settings are crucial for capturing exceptional photos of glass countertops. Shooting in RAW format provides the most flexibility for post-processing, while JPEG or JPG is suitable for those who prefer minimal editing. Using a tripod helps eliminate camera shake, ensuring sharp images, especially in low-light situations.
Here’s a quick reference table for optimal camera settings:
| Setting | Recommended Value |
|---|---|
| Aperture | f/8 – f/11 |
| ISO | 50-100 |
| Shutter Speed | 1/10 – 1/250 Daylight vs Night time |
| White Balance | Auto or Custom |
| Shutter Time | 2 seconds plus night time |
Remember to adjust these settings based on the lighting conditions and desired creative effect.
Composition Tips for Capturing Glass Countertops
Composition is important for highlighting the beauty of glass countertops. You can use elements like the edge of the countertop or patterns in the glass to guide the viewer’s eye through the picture. Techniques such as the rule of thirds, symmetry, and negative space can also help you with your composition.
For example, if you align the edge of the countertop with one of the vertical lines in the rule of thirds, you can make a balanced and attractive image. Symmetry can help showcase the sleek design by making both sides look the same. Negative space around the countertop gives it room to breathe and lets the glass stand out.

By learning these principles and trying different angles, you can take eye-catching photos that show a wide variety of styles of countertops.
The Role of Backgrounds in Glass Countertop Photography
Backgrounds play an important role in how glass countertop photos look. A neat and simple background highlights the beauty of the countertop. Meanwhile, a textured background can create depth and make the photo more interesting.
Think about the setting. A minimalist background works well with a modern glass bar top, while a warmer textured background could be a better fit for rustic kitchen counters. If you are taking photos at a location, using a backdrop can help keep the focus on the countertop and reduce distractions.
When choosing a backdrop, make sure its color and pattern match well with the countertop. Look for backgrounds that enhance the style of the countertop and improve the overall look of the photo.

Post-Processing Techniques for Glass Countertops
Post-processing can improve your glass countertop photos. It helps bring out their best features. Still, it’s important to keep a natural look while making the images clearer and more brilliant. You can adjust the brightness, contrast, and highlights a little to make the glass shine.
It’s also important to remove dust spots and fingerprints during post-production. This gives the photo a polished finish. Tools like cloning or healing brushes are very useful for this job. You might want to adjust the white balance too. This helps ensure accurate colors, especially when using different light sources.
If you used light strips or other lighting methods, post-processing helps adjust the brightness and color. This way, you can create the mood you want and improve the overall look of your photo.
Using Props to Enhance Visual Appeal
Using props wisely can make your glass countertop photography look much better. Well-chosen props can add life and character to your photos, grabbing the viewer’s attention at first glance.

Glass counters are a beautiful addition to any kitchen or bathroom, adding a sleek and modern touch to the space while also being easy to clean and maintain
Think about using props that match the theme and look of the countertop and its surroundings. In a modern kitchen, you might use sleek glassware, a bright bowl of fruit, or a stylish coffee maker to complete the picture. The goal is to pick props that enhance the countertop’s presence without taking away from it.

When you arrange the props, keep composition in mind. Avoid making things too cluttered. Aim for a nice balance between the countertop, the props, and the empty space in the picture.
Capturing the Texture of Glass Countertops
While glass countertops look very smooth, showing their creative textures can make your photos more interesting. You can use side/edge lighting or down-lighting to make the light and texture in the glass stand out.
For example, if you place a light to the side of the countertop, it can create a nice contrast of soft shadows. If you use backlight, it can create a lovely glow around the edges, highlighting the shapes of the glass. But, this technique tends to wash out the textures, while adding height to the cabinet for the light box.

When taking close-up photos, using a macro lens lets you see the surface better. It can bring out the small details or textures, showing the skill used in making the countertop.
Conclusion
In summary, taking great photos of glass countertops needs both technical skills and some creativity. You must understand reflections and optimize the lighting. Choosing the right tools and improving your editing skills is also important for amazing pictures. Focus on composition, backgrounds, angles, textures, and props to make your photos stand out. To create beautiful pictures that show off the charm and depth of glass countertops, practice and try new things. Use these tips to get better at photography and make high-quality images that connect with your audience.
Frequently Asked Questions
What is the best time of day to photograph Glass Countertops?
The best times to see your glass countertop clearly are usually in the early morning or late afternoon. During these times, the natural light is softer and smoother. This kind of lighting makes everything look better by reducing strong shadows on your countertop.
Can I use a smartphone to take high-quality photos of Glass Countertops?
Professional cameras let you control your shots better. However, smartphone photography has improved a lot. With good lighting, thoughtful composition, and a
Glass Countertop photograph picture settings
tripod, you can take great quality photos of glass countertops with your smartphone.
What are some common mistakes to avoid in Glass Countertop photography?
Common mistakes are not handling reflections well, using bad lighting, and ignoring composition. If you use the tips in this guide, you can avoid these problems and take beautiful photos of your glass countertop.

Jeff Downing
Founder, Lead Designer & Custom Glass Countertop Expert
Jeff Downing of Downing Designs, is a Tampa Florida–based design studio specializing in custom Glass Countertops, Glass Bar Tops, Glass Vanity tops and Glass Stair Treads. With decades of hands-on experience, Jeff is widely recognized for delivering textured glass surfaces integrated with LED lighting to create dazzling abstract statement pieces.
"Glass. Lights. Ambiance".