Last updated on July 1st, 2026 at 05:49 am
Glass countertops have become a defining feature in luxury Florida homes, particularly in Florida where demand is driven by luxury remodeling of coastal homes and commercial properties in:
- Tampa
- Sarasota
- Naples
- Miami
- Ft Lauderdale
- Boca Raton
- West Palm Beach
Prices for glass countertops have changed significantly since 2020. Raw material availabilty, labor expense and availability in Florida have all influenced current pricing. As with many things...we are not insulated.
This guide provides 2026 glass countertop pricing in Florida, based on custom remodeling projects — not national
averages — so homeowners, designers, and builders can plan accurately. Projects such as:
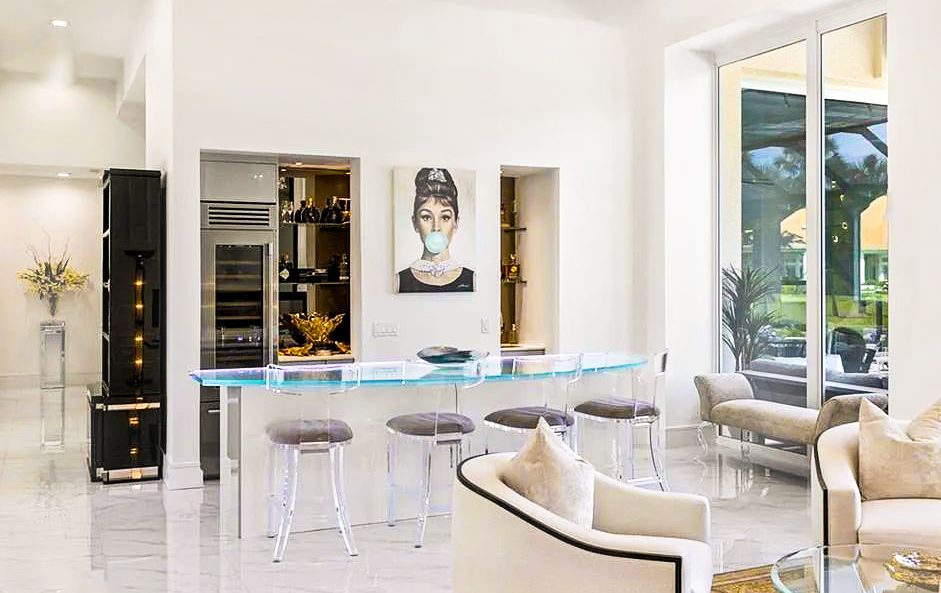
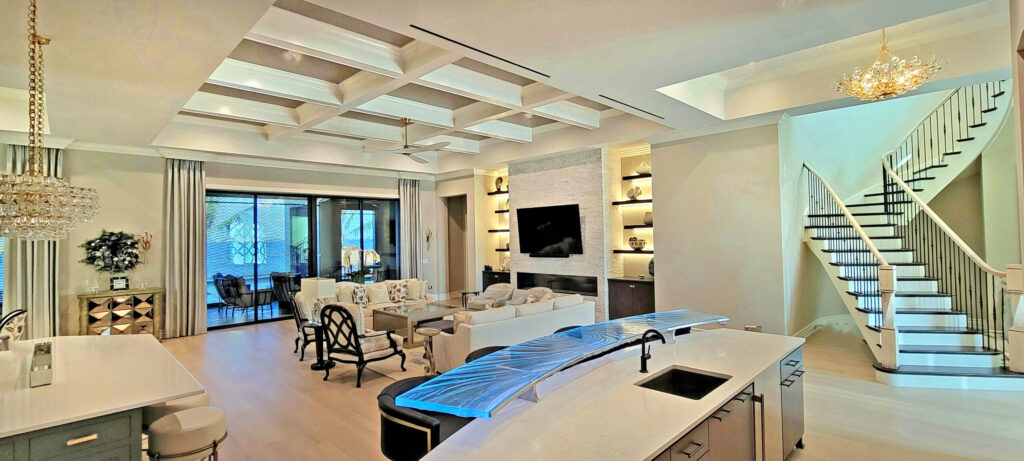
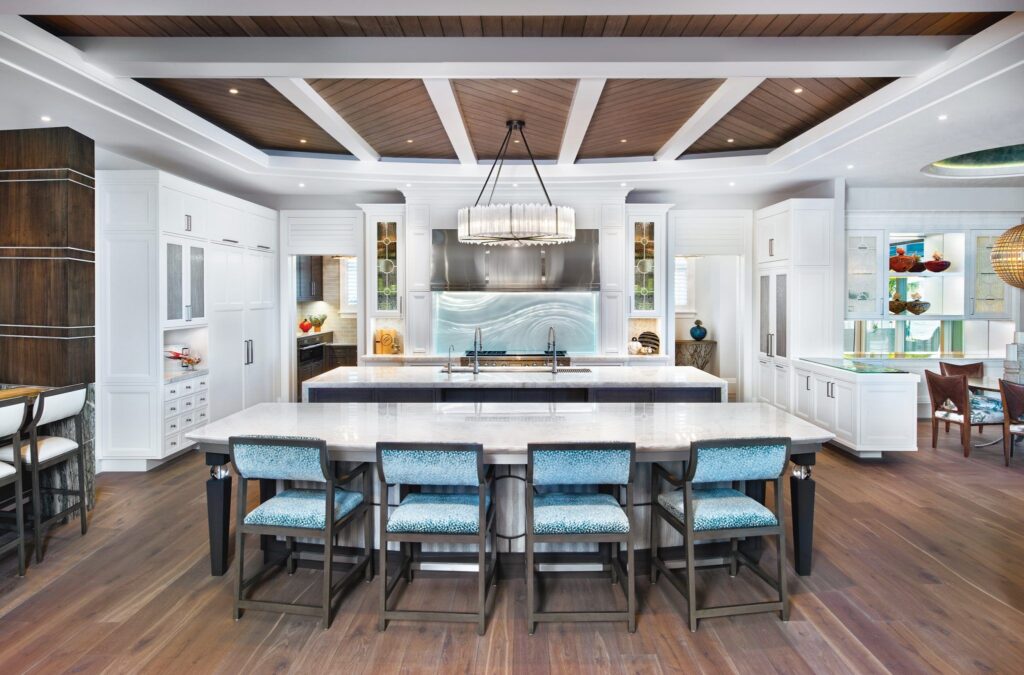
- Modern Home Bar Designs in Luxury kitchen remodels
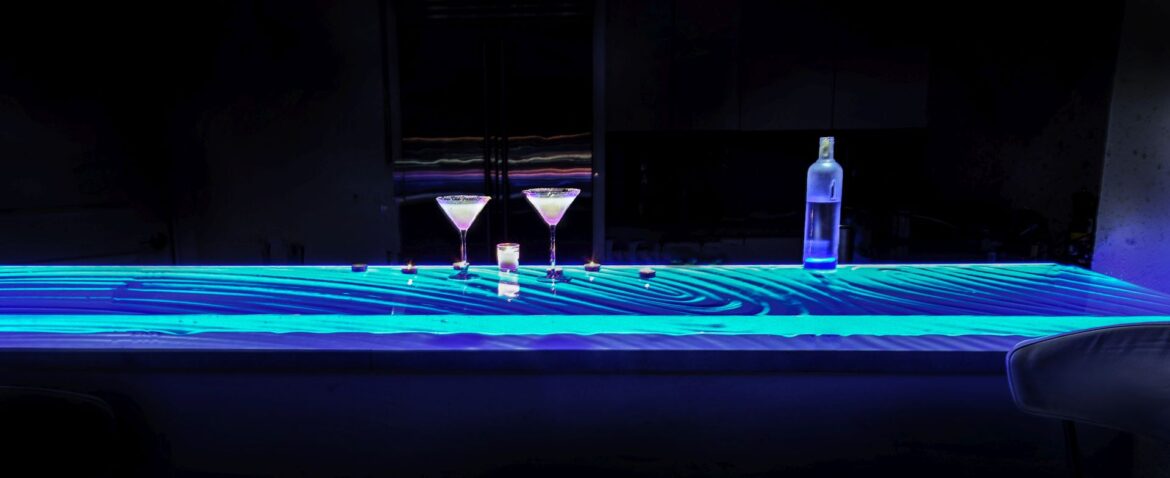
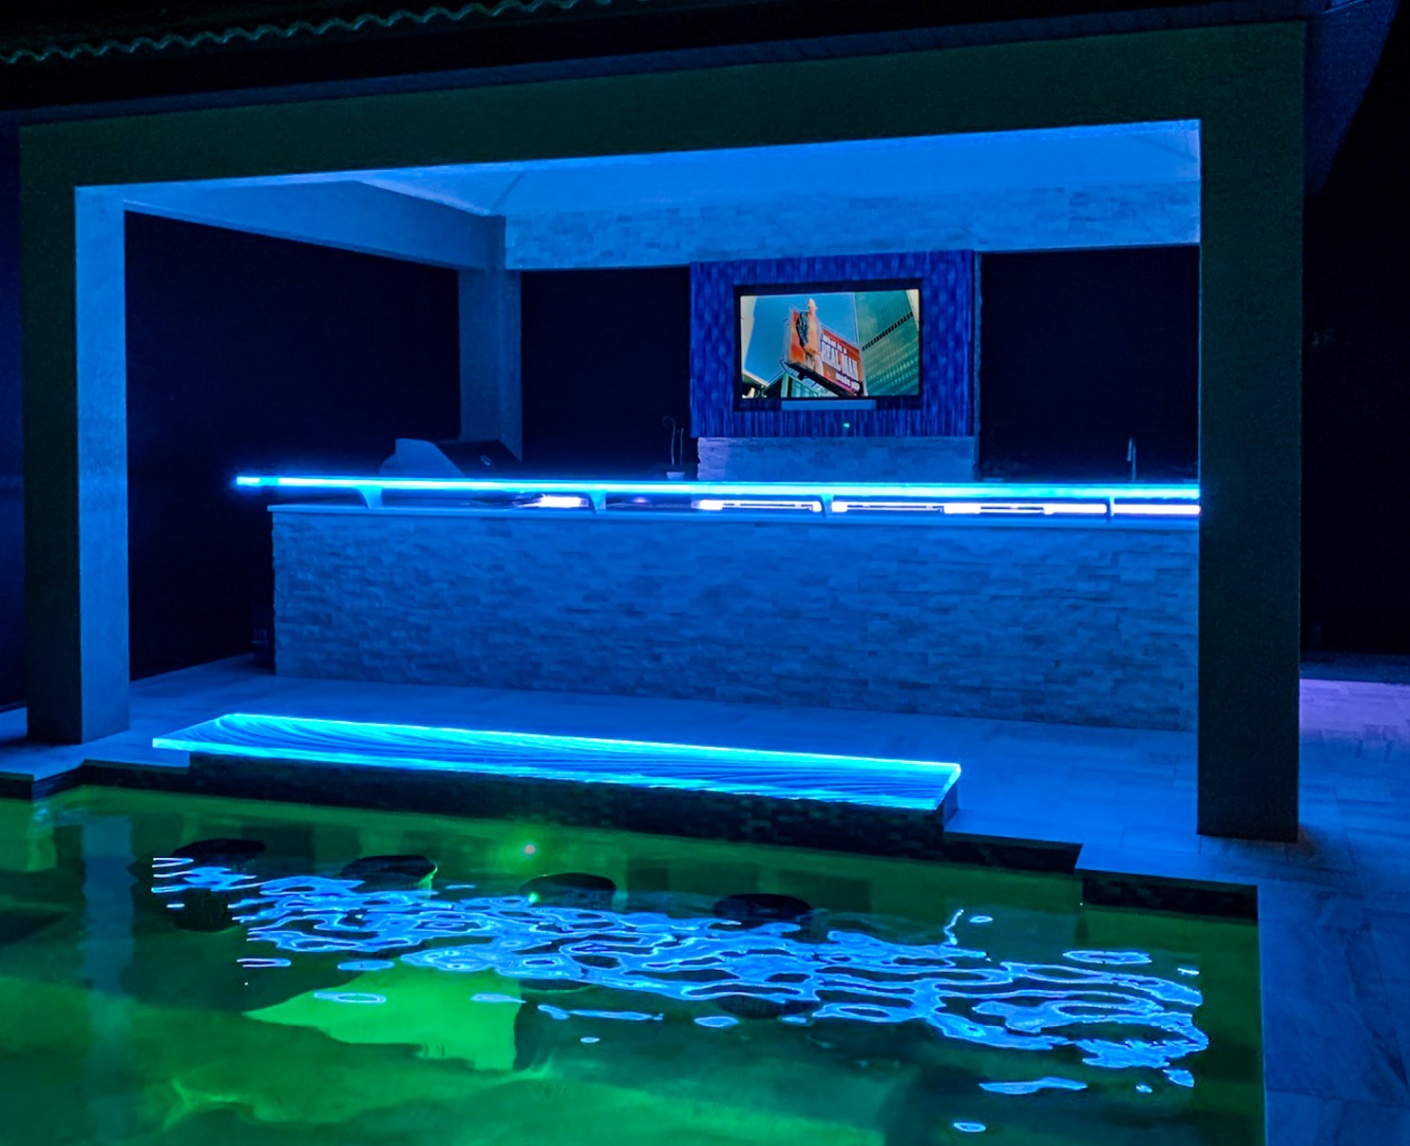
- Outdoor kitchens and backlit countertops and bars
- Coastal homes with pool bars and swim uop pool bars
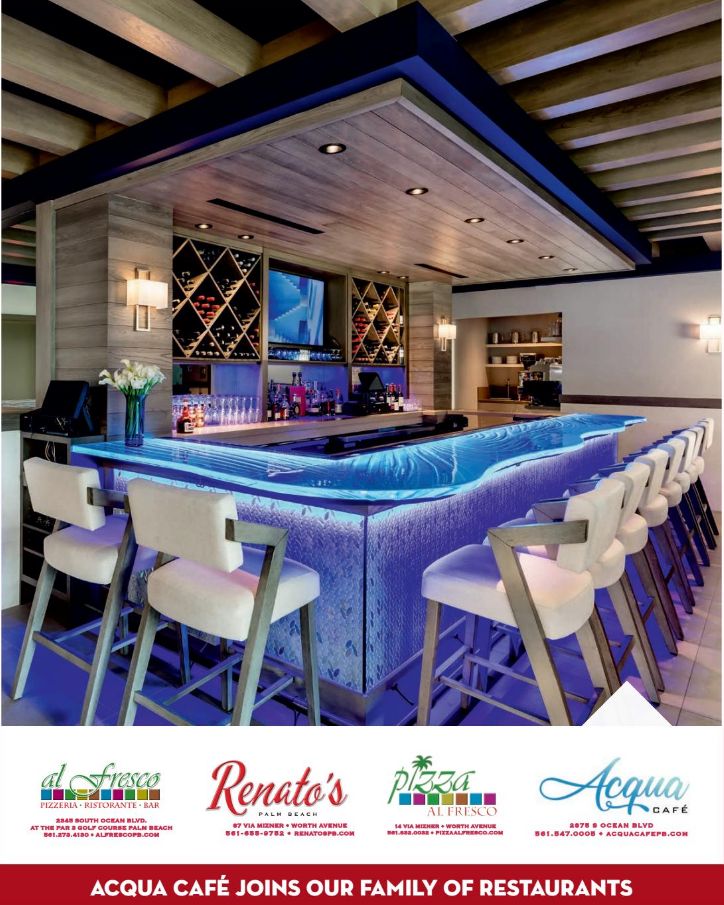
- Glass Bars for Restaurants
- Custom Kitchen Island Bars and Islands
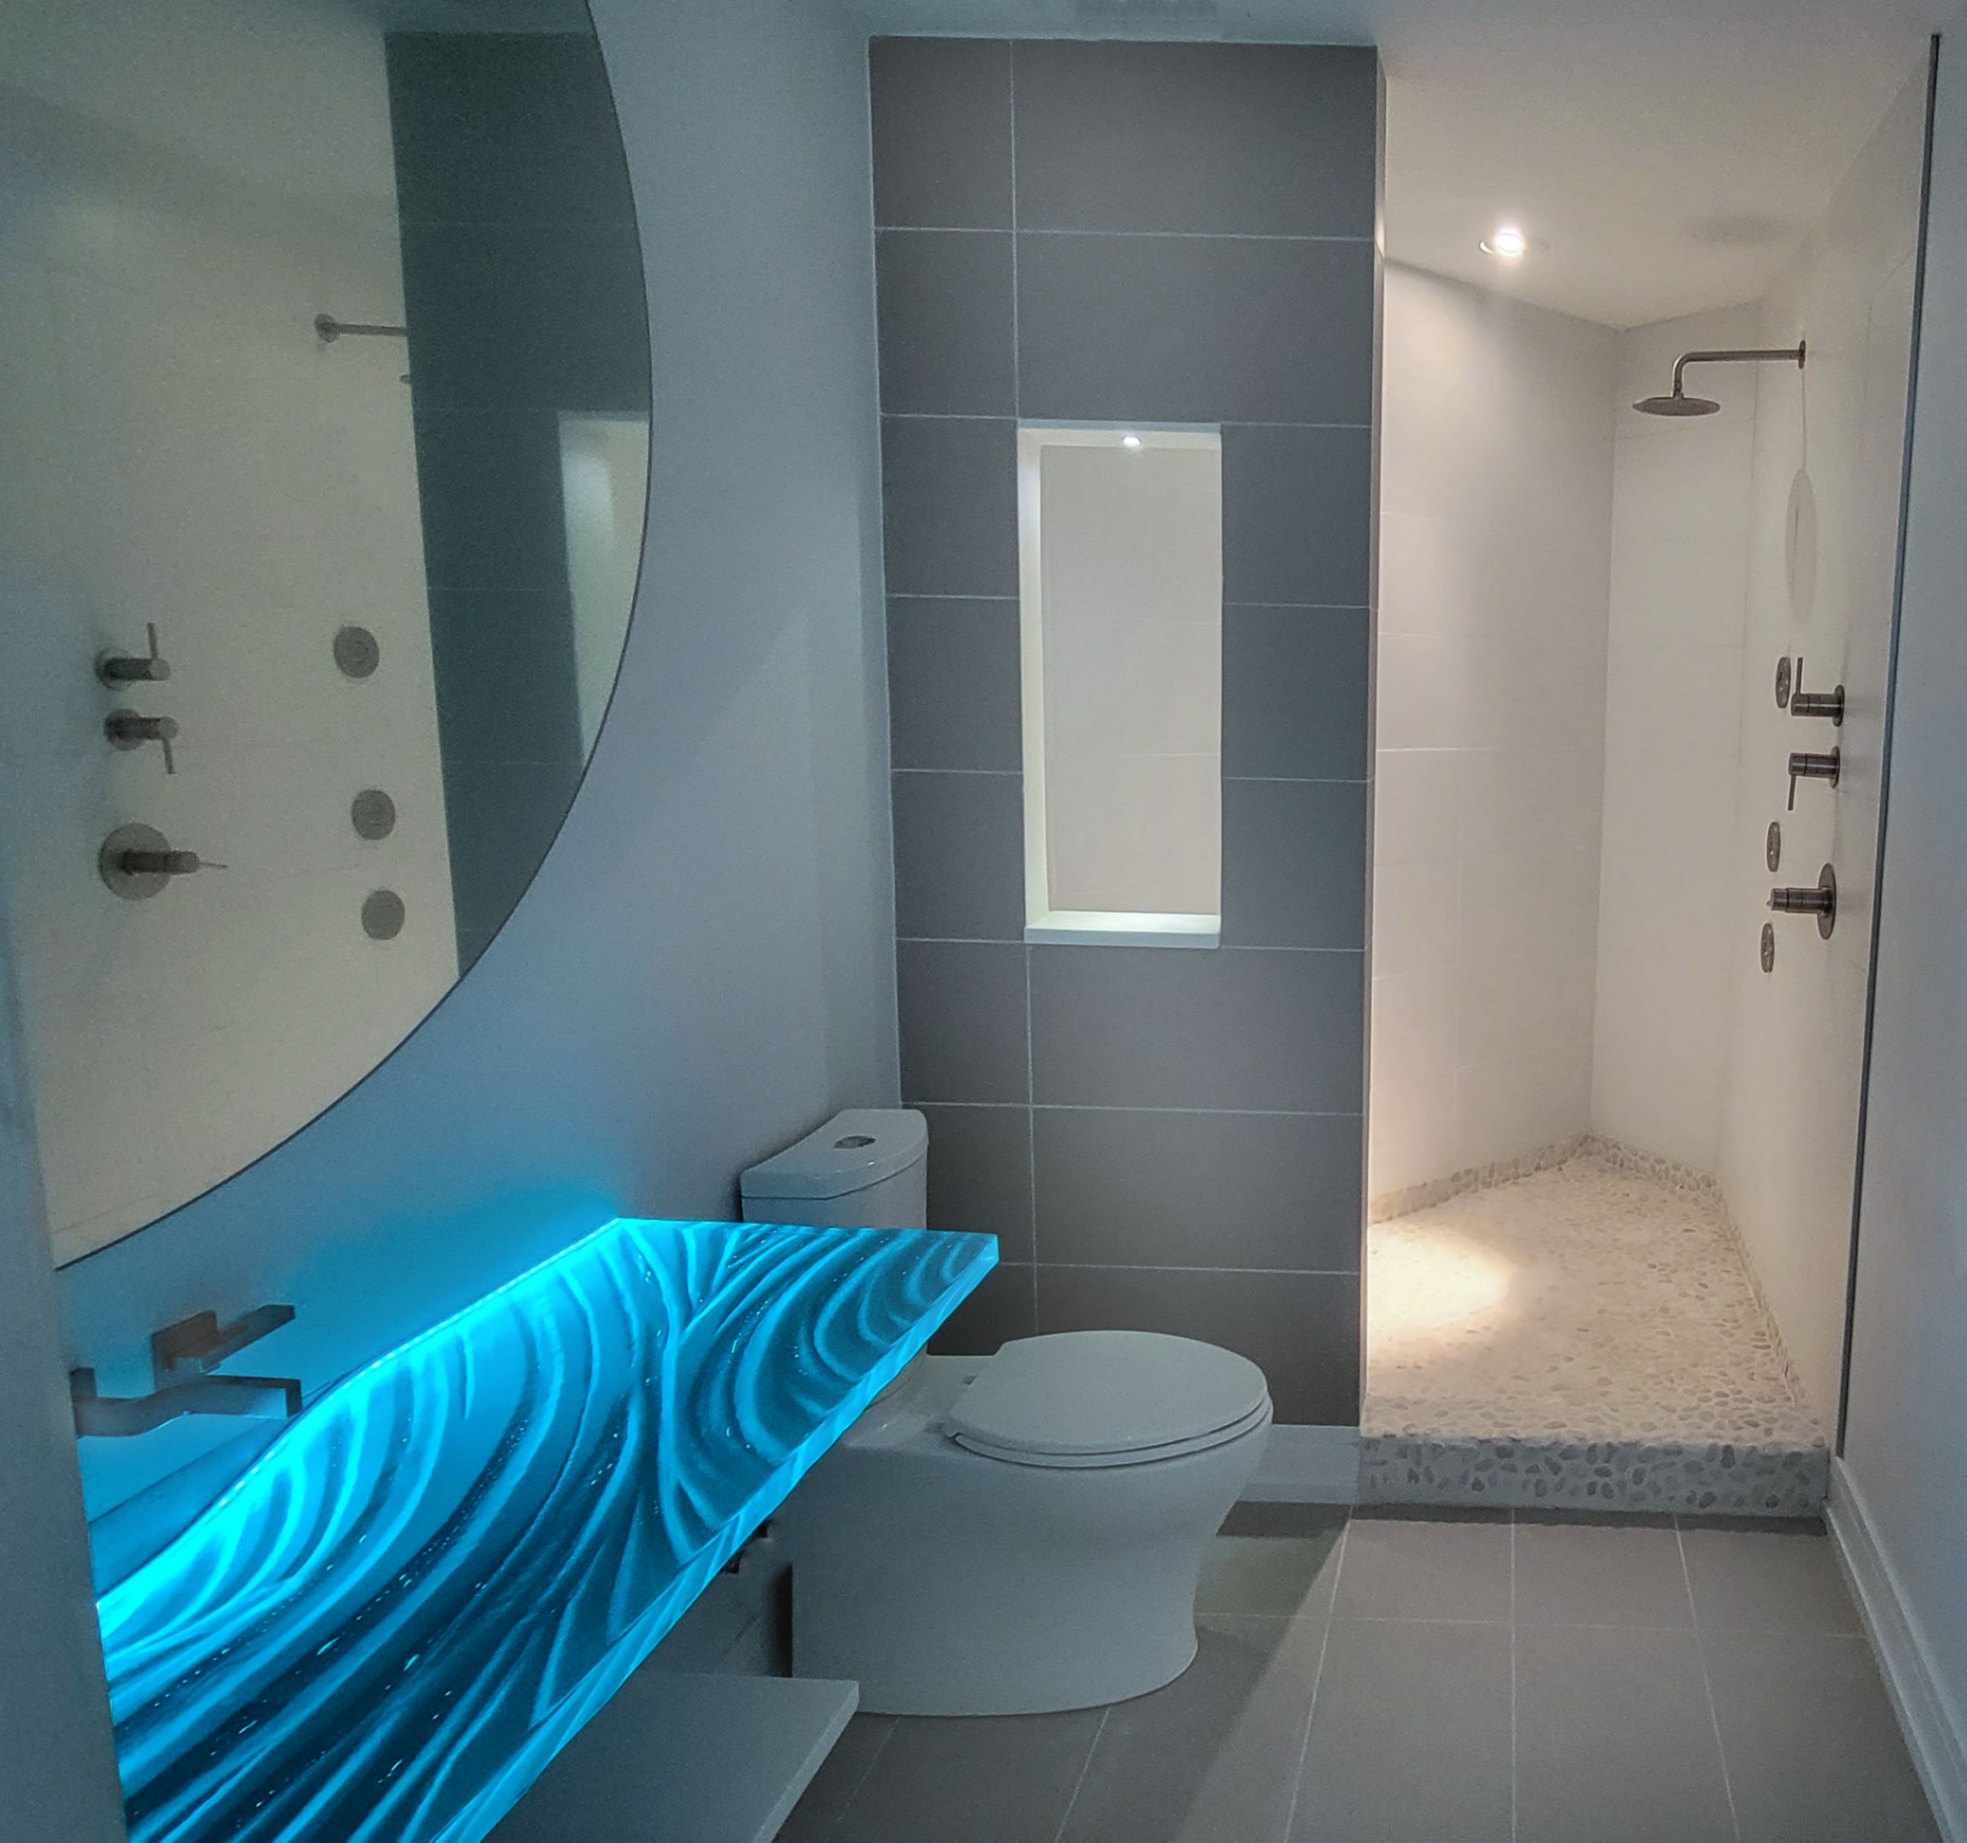
- Glass Vanity Tops
Im Jeff Downing and I have been designing, fabricating and installing my glass counters everywhere in the state of Florida for over 20 years.
I have personally installed millions of dollars of glass countertops, glass bar tops glass vanity tops in luxury homes and condos in Tampa, Sarasota, Naples, Ft Lauderdale, Miami, Boca Raton and West Palm Beach in Florida.
I have earned my 5-Star ratings on Houzz with hard work and honest expectations set upfront.
This buyers guide attempts to account in glass pricing factors, including thickness, LED lighting, fancy cuts, delivery and installation difficulty, standard delivery vs expedited, bar support prep, backpainting, shipping, etc. There is only way to find out for certain...call and get a quote. Its fast and free.
In 2026, most custom glass countertops in Florida fall within the following price ranges:
- Entry-level custom glass bar top: $200-300 per sq ft
- Mid-range custom glass: $300–$400 per sq ft
- High-end custom glass / illuminated / outdoor glass: $500-$1000+
- These prices typically reflect custom fabrication, in Florida.
- Glass thickness is one of the biggest cost factors.
For a detailed breakdown of thickness options, see our guide on glass bar top thickness.
How Glass Countertops Really Differ —
What Impacts the Cost of Glass Countertops in Florida?
- Texture Originality
- We Artistically Sync the texture with your space
- Most details can be agreed upon remotely
- Attending the kiln carving event in-person
- Glass will last forever. Dont miss the birth of your baby.
- We Artistically Sync the texture with your space
- Intricacy of Fabrication
- Curvaceous cuts, sinks require more time
- Glass thickness (1.5", 2"+)
- Thicker + more expensive, Longer Lead times
- Longer times reduces turnover in my kilns, hence you pay higher annealing "rent"
- Custom Glass Table Tops are often 1" thick due to minimalist bases
- Manufacturing Country
- USA made products are shorter lead times, avoid 35% tariffs.
- Edge polish quality
- CNC machines leave unpolished and sharp edges vs hand-polished edges with roundovers for smooth feel
- Lead times
- Available In stock designs can often be shipped in 3 days
What is the typical Thickness of a Kitchen Glass Countertop?
1.5” is the typical glass countertop thickness. 1.5” thick glass weighs ~21lbs per square foot. Thicker glass adds to cost exponentially as the glass annealing time is an exponential function of thickness. E.g. 1.5” thick glass countertop will require about 10 hours to properly anneal. For a 4” thick piece, it will take ~14+days. This translates into a higher cost glass countertop.
- Thicker glass increases material, labor, and handling costs
- Heavier slabs will affect transport and installation logistics in condos
- Thicker glass enhances visual depth and edge detail
- 1.5" glass is structurally strong and can span a great distance (over 120") between supports
- 95%+ of all our glass countertops are 1.5" thick
Condos in Miami, Boca Raton and Naples must pay attention to elevator height and weight constraints, while single-family homes often choose glass thicker than 1.5-inch for a bolder look.
Indoor vs Outdoor Installation
Not all Modern Home Bars are indoors. Outdoor kitchens are extremely popular in Florida. Because glass is non-porous and unaffected by salt air or humidity, it performs exceptionally well outdoors.
Outdoor glass bars and countertops may require:
- Outdoor-rated adhesives
- (IP-68 rated)
- Stainless steel supports and LED covers
- Outdoor rated electrical wiring prep
- Salt water and pool water safe LED lighting systems
Glass Countertop Costs by Florida Region
Naples, Sarasota & Southwest Florida
Naples, Sarasota projects often feature:
- Large outdoor kitchens with backlit countertops and bars
- Poolside bars or swim-up pool bars
- High-end finishes and custom shapes
Typical Price Range:
$400+ per square foot
Boca Raton, West Palm Beach and Ft Lauderdale
South Florida homes and condos frequently require:
- Precise sizing of materials to fit elevators, tight turns
- Complex install logistics
- Modern commercial bar design ideas from Architects
Typical Price Range:
$450+ per square foot
Tampa Bay & Gulf Coast
Tampa projects commonly combine:
- Indoor kitchens
- Entertainment bars
- Transitional indoor/outdoor spaces
Typical Price Range:
$350+ per square foot
Compare Glass Countertops Design Options.
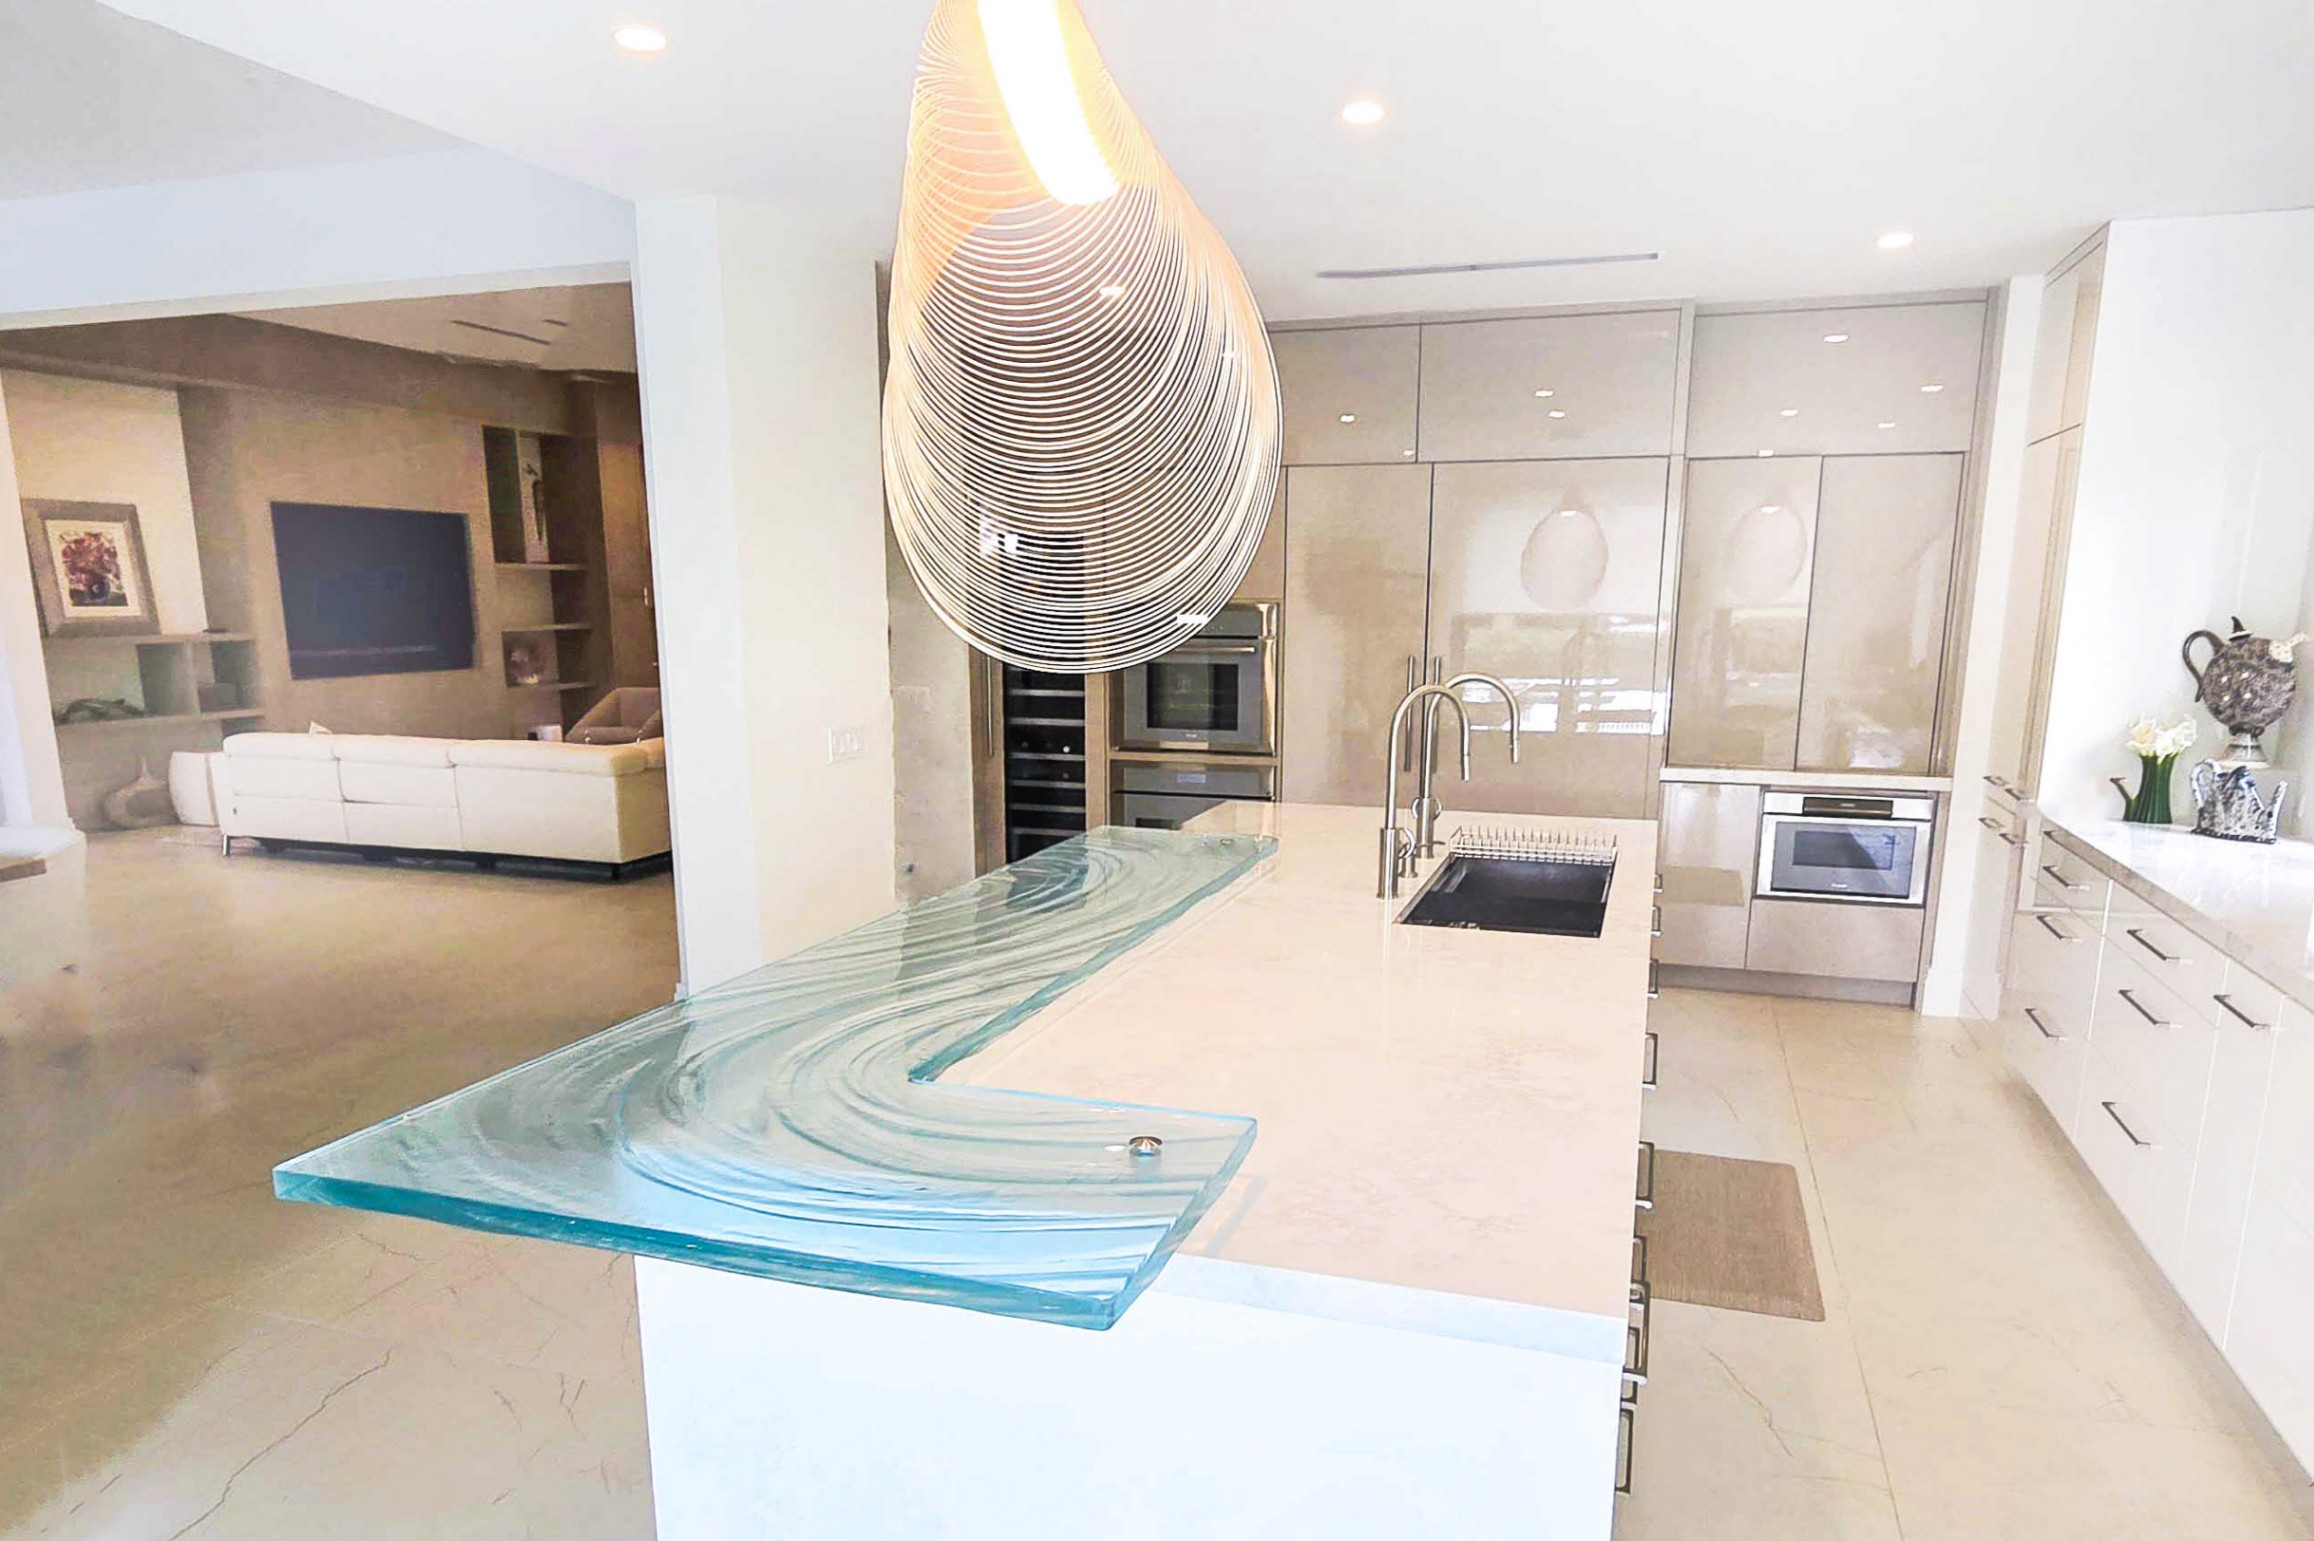
Textured glass countertop designs can take any shape. We offer Artistic hand-texturing of our glass countertops to enhance the flow of the space where it resides. Hand-made textures designed to "flow" with your room are created interactively and requires experienced foresight to visualize how our textural flow can elongate your kitchen or bath. A well-designed modern home bar design with a custom glass countertop will have a large visual impact on the room it inhabits.
Our Glass Bar Tops are all about choreography. You need to make sure the movement of your guests through your home is well-designed, and the right texture in a glass bar top is my favorite tool for this – it’s theater. Our custom glass bar tops have design elements that spark conversation. It brings life to your home and it’s definitely a central magnet for guests to migrate towards.
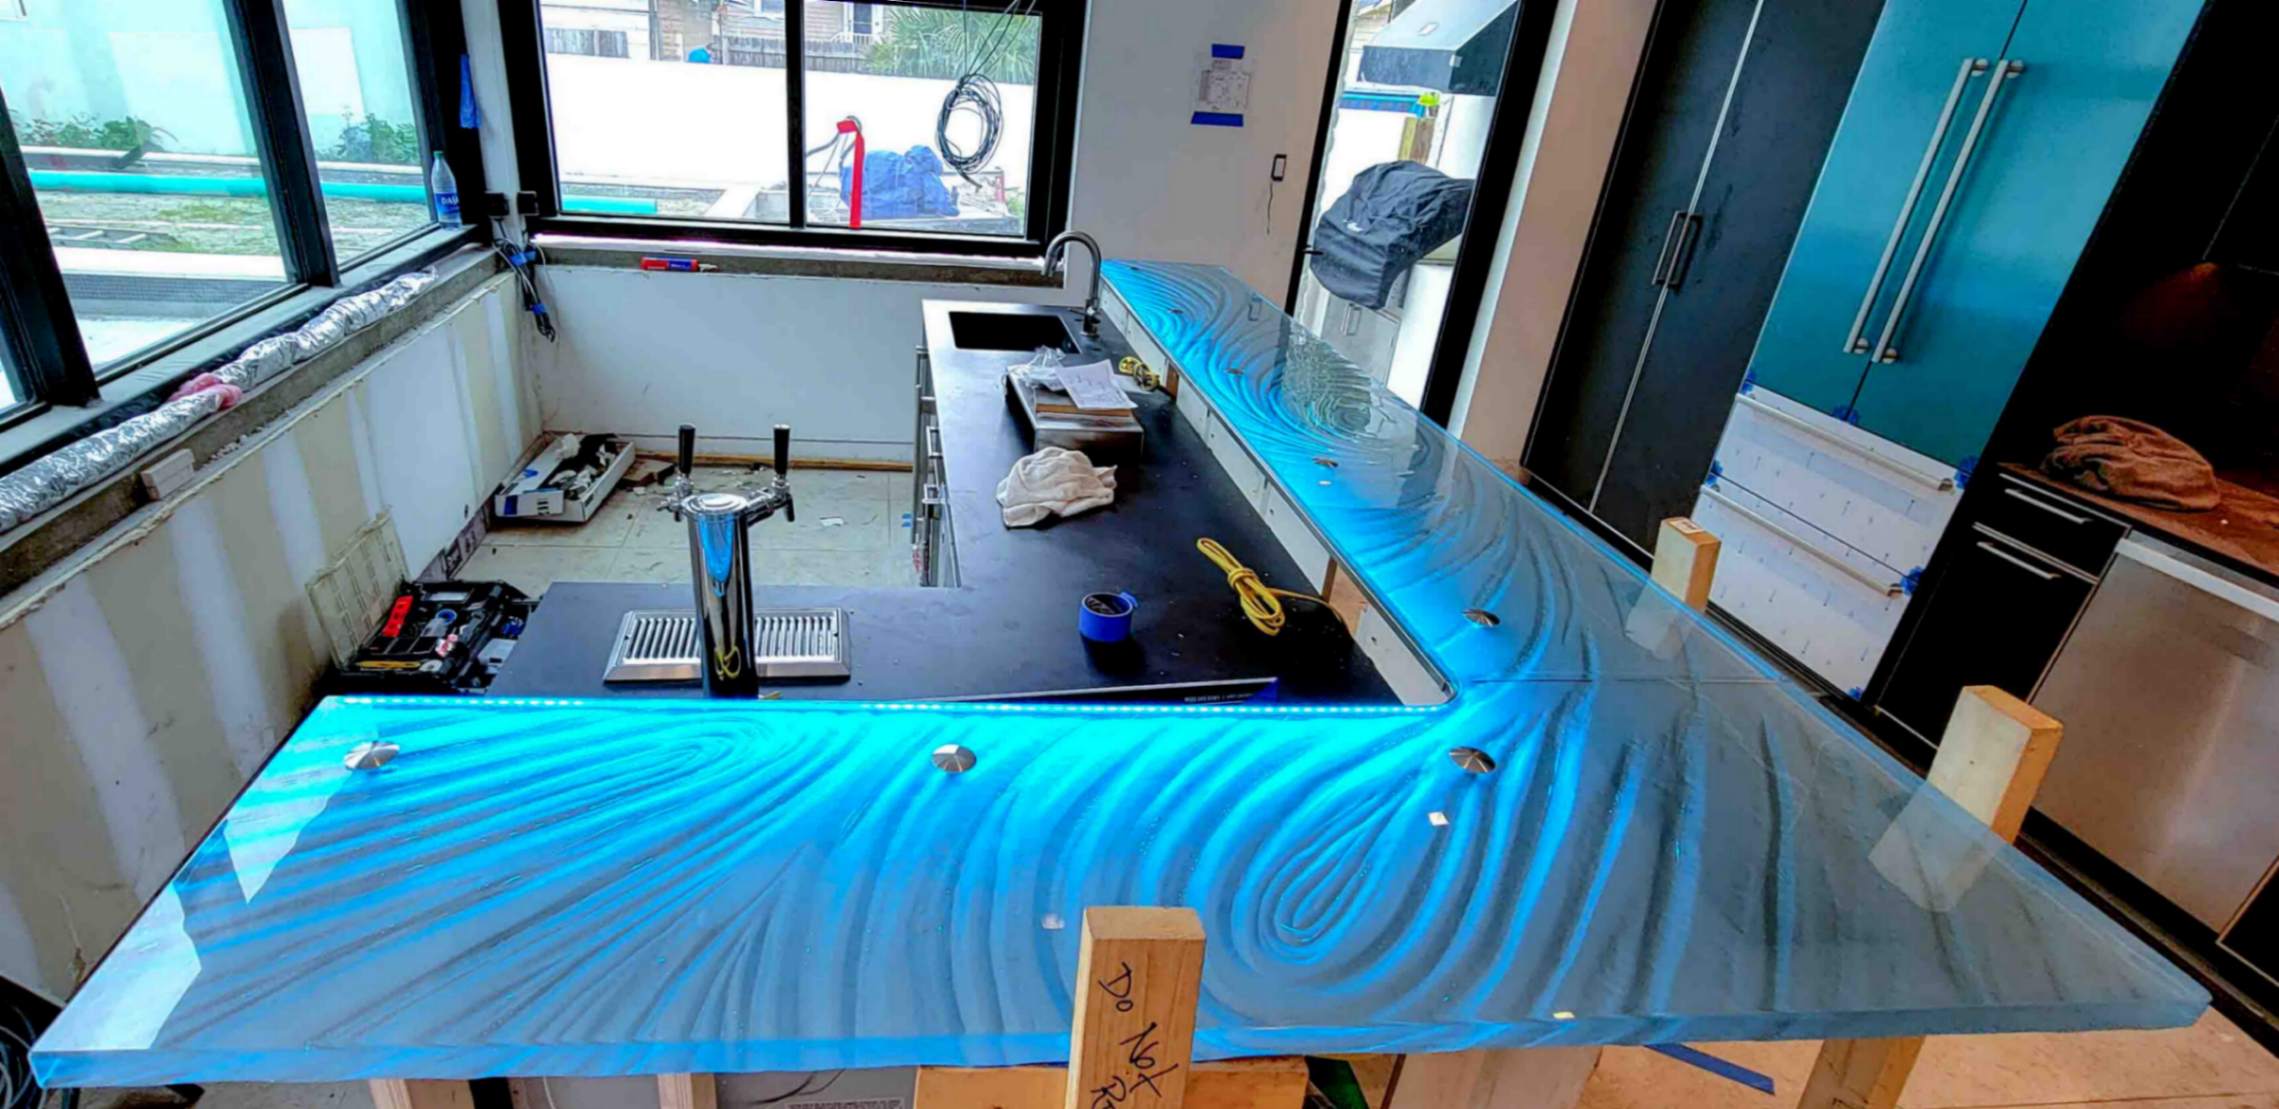
This is especially important in commercial interiors where a bar may require several pieces. Sequencing is critical. Static texture glass does not flow from one piece to the next and the seam will be hideous. Static and Flowing Hand-Textured glass countertops cost the same. For this reason, over 99% of our sales are Hand-Textured. Why buy a copy when you can have an original?
Look at the seam in the picture below. You do NOT get this with a stamped replica...not even close!
Sequencing is especially important when designing large custom glass countertops installations in:
- Long custom glass bar top for Florida restaurants
- Large commercial grade glass countertops
- Huge lobby glass bar tops for Luxury Hotels
- Big Nightclub illuminated glass bars
Custom Glass Countertop Edge Polishing.
Polishing Glass to an optically pure quality takes 11 steps and a great amount of skill. CNC machines cannot compare, as they produce highly visible lines on the edge. “Liney but shiney” may be OK for granite, but it visibly obscures the refraction potential of the glass. Make sure you inspect the quality of your edge polish before buying glass counters. Roundovers on the top are preferred vs sharp 45 degree bevels. Bevels chip easily. Round overs do not. Long term comfort and functionality matter at Downing Designs. This is why we invest so heavily in our hand-polished edges. There is nothing else that even comes close from our competitors.
Back Painted Glass.
Textured Glass Countertops are transparent, and can be back painted any color to hide the contents of your cabinets below. Glass backsplashes can be fabricated that offer any color match from Benjamin Moore or Sherwin Williams. Back painting glass metallic silver adds great depth to the textures and is the #1 glass countertops backpainted color.
Frequently Asked Questions About Glass Countertops in Florida
Im looking to buy a Glass Countertop in Florida ... Is a Glass Countertops durable?
If you compare Glass Countertops vs Vetrazzo vs Quartz vs Marble in Florida you will see the difference is in the stain resistance and durability. The stain-free, non-porous nature of glass has no way for stains and bacteria to get into of a micro-smooth, non-porous surface.
For Quartz:
- Quartz... is not a stain-proof material. In fact, quartz countertops are susceptible to stains from coffee, tea, wine, and chemical spills.
- Placing hot items on the countertop can cause burn marks
- Permanent markers will leave marks on any surface. Quartz countertops are no different... the result is permanent ink marks on the countertop surface....Caesarstone
For Marble:
- Etching occurs when acidic substances (Vinegar and Ammonia, react with calcium carbonate in the marble, creating dull spots on the finish.
- Staining occurs with Coffee, Tea, Carrots, Acidic foods (Red Wine, Lemon juice, Tomato sauce, Coca-Cola) olive oil, Rusty steel wool or metal objects.
No Sealers needed to offer stain resistance. Other materials need periodic resealing.
| Material | Average Cost (FL) | Outdoor Use | Heat and Light Resistance | Maintenance |
|---|---|---|---|---|
| Glass | $$$$ | Excellent | Excellent | Very Low |
| Quartz | $$$ | Poor | Poor | Low |
| Marble | $$$ | Moderate | Moderate | Moderate |
Florida Glass Countertop vs Quartz Comparison Takeaway
Glass Countertops outperform quartz outdoors and rival marble and granite in durability, while offering greater design flexibility and easier maintenance.
Yes. Glass countertops are very durable. as evidenced by the large volume of consumer and commercial bar top repeat orders. Nobody buys a bad surface a 2nd time. Glass countertops are an excellent commercial countertop solution.
How are Textured Glass Countertops made?
Downing Designs hand carves each texture to the specification of the client. We sync the design with the natural way people navigate the space. You have to trust someone in this world to walk you through from start to installation...that's exactly what we do. My 5-Star reviews on Houzz and Google tell an impressive story in itself.
Ultra Low Iron Glass is stacked to the desired thickness and fired in kilns atop a textured sand bed to over 1400 degrees F.
The glass becomes viscous and flows to conform to a sand bed mold. The annealing process takes several days. The glass is cut, polished 10000 grit, accessorized with custom LED light systems and installed.
See the below video:
https://youtu.be/7oerw9XUjZY
Where do I find a trusted fabricator near me for luxury glass countertops in Florida?
- Downing Designs is located in Tampa, Florida and templates, fabricates, and installs glass countertops in Florida.
- Florida Local: We operate in Tampa, St Petersburg, Sarasota, Ft Myers, Naples, Ft Lauderdale, Miami, Boca Raton, Jupiter and West Palm Beach.
- Trust and Experience: Our 5-Star ratings on Houzz are compelling trust and experience evidence in your search.
- Look at a few of our Projects here that tell the whole story.
Are glass countertops considered an eco-friendly option?
- Yes, our glass is comprised of about 25-30% recycled glass it is a very eco friendly material.
- The glass itself at the end of its life can be easily recycled.
What styles of sculpted glass countertops are popular for modern kitchens?
- Downing Designs offers unlimited style choices for custom glass countertops in modern kitchens. We are 100% custom as each design is hand-made, and no two are the same.
- We offer calm or stormy patterns.
- Start with a scale sketch of your room layout, then regard how people will enter your space. Our custom textures then flow with the room.
- The result is an elegant custom-fitted design, resulting from artistically synchronized glass counter and vanity design though out your space.
- Downing Designs floating glass vanity top with integrated sink is amazing and pairs well with our raised kitchen high bars.
What is the difference between recycled glass and solid glass countertops?
- Solid glass countertops are 100% glass and non-porous. They add tremendous ambiance to your home.
- Vetrazzo is recycled glass. and uses cement and polymer binders to make.
- Recycled glass countertops cannot be illuminated with LEDs. They add nothing to your ambiance.
Are glass kitchen countertops worth the money?
- For Modern homes where unusual is in demand, a custom glass countertop is in a class by itself in terms of how it affects the quality of Life, from morning to evening. You have ambiance control with attached LEDs.
- Utility: Our glass bar tops are: Breakfast bar, Worktop, Happy Hour bar, Party atmosphere dialed directly with LED lights to control the mood, and can "wake up" so you arise in a low level light vs total darkness.
- Cleaning a glass bar top is a breeze with Windex.
- Unfussy is the New Luxury. Glass bar tops represent a very good, but simple life. None of these advancements are available with ANY other material. Glass Bar Tops and Countertops are truly a Modern Material.
What do makers of glass countertops have in their own homes?
Jeff Downing of Downing Designs uses Glass Bar Tops, Glass vanity top, glass tables, white glass countertops in his own home. They are The Defining Elements in his condo.
On a personal note: I love them. I set a timer on my Ambiance Machine #1 to wake up at 600am...so I can find my coffee machine at 0 Dark Hundred. Thats a nice way to wake up every morning. It turns off at daylight. It turns back on at dusk, off at midnight. Same with Ambiance Machine #2 in my bathroom. Ambiance Machine #3 is connected to hallway and comes on at dusk. All connected to one app on my smart phone. Simple. Effective. Happy Life.


Jeff Downing
Founder, Lead Designer & Custom Glass Countertop Expert
Jeff Downing of Downing Designs, is a Tampa Florida–based design studio specializing in custom Glass Countertops, Glass Bar Tops, Glass Vanity tops and Glass Stair Treads. With decades of hands-on experience, Jeff is widely recognized for delivering textured glass surfaces integrated with LED lighting to create dazzling abstract statement pieces.
"Glass. Lights. Ambiance".