Last updated on April 19th, 2022 at 07:38 am
Templating Countertops
-
Table of Contents
-
Tools Needed to Template
-
Discussion Prior to Templating Countertops
-
Templating Countertops
-
Gotchas
In order to insure proper fit of your custom countertops, we herein offer insights into Templating Countertops. Downing Designs templates, fabricates, ships and installs countertops all over the USA. We are happy to fly to remote sites if a template visit is required, but often these can be accomplished by the user using inexpensive tools.
We offer in this blog insight into how best to accurately template and to communicate the details of your countertop or backsplash, should you need to template your surfaces for us. As ever, we are here 24/7 to take your call and confidently guide you through the process. Our custom glass countertops are too expensive to fabricate and ship…only to find out that they are the wrong size. Lets dig in and get it right…
1. Tools Needed to Template
Amazon or Home Depot sells everything you need
Graph Paper, pencil, ruler with millimeters. Draw to scale ( 1” = 1mm ).
Large Framing square…at least 16” x 24”
Measuring tape get a strong one
Gorilla Glue Sticks and a hot glue gun 0.43” diameter sticks
Template plastic strips
Sharpie Marker permanent ink
Sink Setter for Kitchen or Bath. Can install and plumb sink anytime.
6’ or longer straight edge…like a level…or board.
2. Discussion Prior to Templating Countertops
Cabinets 100% installed and LEVEL across the tops…no changes to be made after templating!
Appliances to be installed are defined: Sinks, Stove, Grills, Burners
Plumbing items to be installed: Faucets, Filtered Water, Soap disp., Pop-Up outlets
Tiling Best to start AFTER countertop after installed
Overhangs
Clear your counters or cabinets before templating
Radius of outside corners, etc
Seam placements
3. Templating Countertops
Do we need a physical template or will a simple drawing do?
All is well if we make sure all items are captured in detail. NO GUESSING allowed.
A drawing and photograph of the site is always a help. Cannot have too much info.
Details need to marked as to the centerline (CL) of these elements:
Seam placements
Stoves, sinks, faucets and other holes, pop up electrical outlets.
LED which side is the feed wire exit? Left or Right side? Look at the following template pictures…see the amount of detail concerning where everything will be sited…MARK EVERYTHING…cannot have too much information.
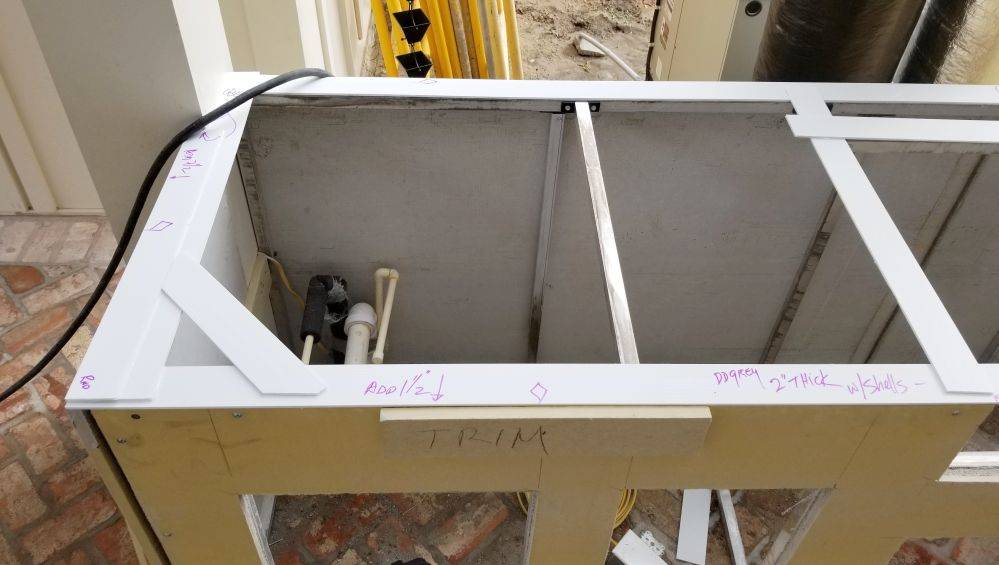
countertop template
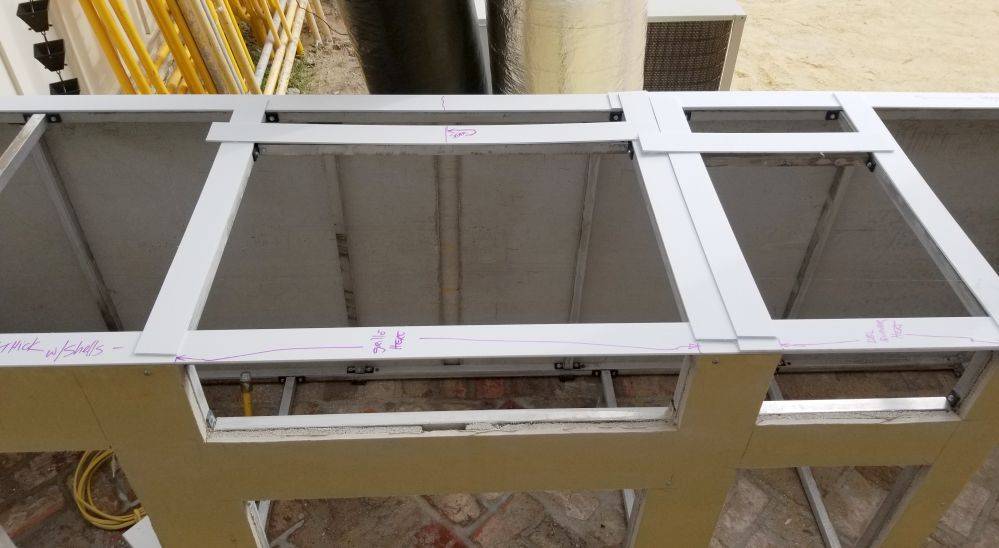
countertop template
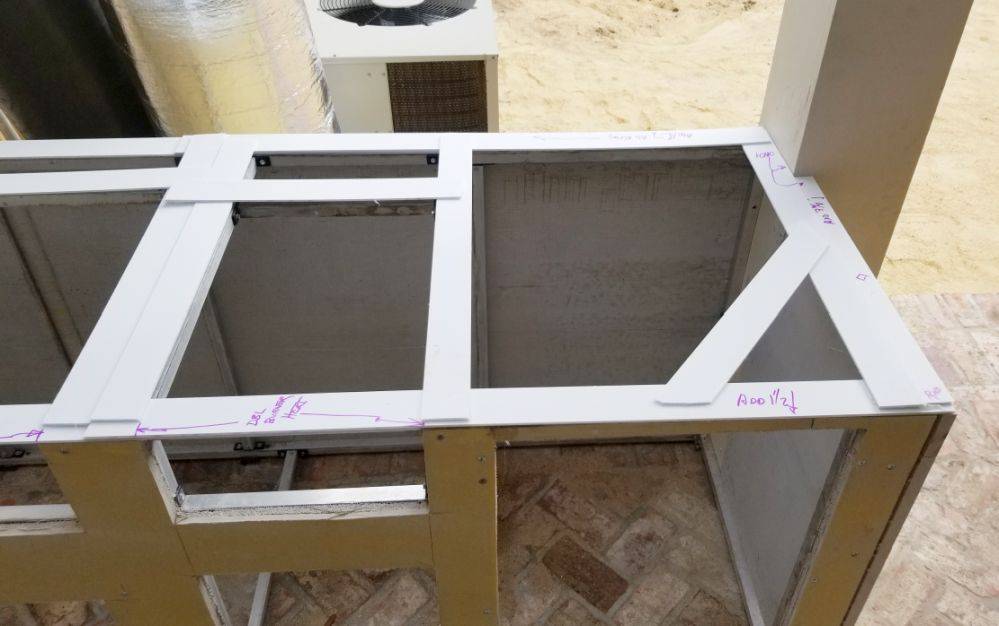
template countertop strip notes
Example 1…Countertop inside 3 walls enclave (Left, Right and Rear)
Is the rear wall straight? Put straight edge against wall… (Take a Picture).
Measure the Length
Pick a corner to start…is it square using a 16×24” square?
If Yes…good!
If No…go to the other corner.
Is it square?
If not, we need to make a template with the strips and glue gun to capture the actual shapes.
If all is square, measure from one corner to about the middle…make a mark on the cabinet top and measure that length. Measure from the other corner to that mark and this way you will have a clean number.
Repeat this in the front of the cabinets.
Repeat this in the middle of the cabinets.
Ideally, they will all be the same number.
We will subtract 1/16” from this width on each end. E.g. if the walls are 100” apart, we will make the countertop 99 ⅞” long.
Make your drawing to reflect the actual numbers you see. Do NOT fudge them. We will discuss the fudge factor with you and the final drawing will be presented to you for approval.
Measure the Width.
Measure at several points across the length to the edge of the cabinet doors and drawers.
Overhangs will be added to these (0.75” is normally used).
E.g. Most cabinets are 24” wide. The doors and drawers are typically ¾” wide. 24 + ¾ = 24.75”
If we add ¾ to that we arrive at the typical 25.5” wide countertop depth/width.
4. Gotchas
What if rear wall is fatter than front?
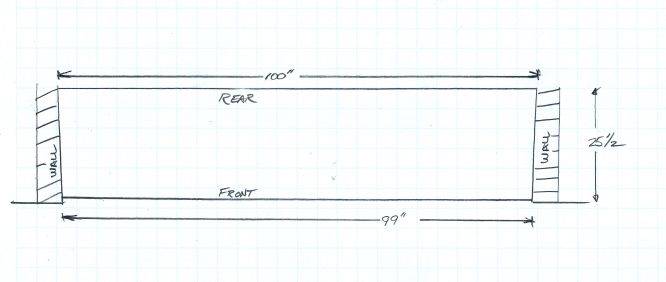
Example of Kitchen enclave countertop template
Often, drywall is imperfectly square. If your countertop is surrounded by a 3-wall enclave, you cannot install the countertop directly. In the example above, the rear is 100″ wide and the front is only 99″.
Therefore, we have to enlarge the width of the enclave front opening. This will require cutting the metal corner drywall bead with a fine tooth saw. You can razor cut the drywall all the way to the wall studs and remove the debris so that we gain ~½”+ width on either side. Drywall repair is cheap and easy to do yourself.
If there are cabinets to the left and right, this is a challenge since we do not wish to cut cabinets. Cutting cabinets is NOT the same as cutting drywall…it never looks great. We are now forced with unenvious options.
- Caulk a bigger than normal gap
- Add tiling atop the countertop after installation
- Add a trim piece over the gaps.
Sinks that are too wide from front to rear.
If your countertop is the typical 25.5” depth, you must leave room for a faucet hole…AND enough countertop material fore and aft to allow installation without cracking the skinny countertop structure. For us…this is a minimum of 3.5” to 4” fore/aft…and may be more depending upon how the glass will be handled/delivered to the cabinet installation site.
This means that a 25.5” countertop with ~7.5” of fore/aft structure requires a sink opening that is no more than 18” wide.
This is why we like Ruvati Workstation sinks. They are well-built, and slim where it counts. Oh and they are MUCH less expensive than the Galley sinks (which are also very beautiful). We have commented upon this extensively, and our favorite solution is to get rid of the useless front countertop piece by using a Kohler Apron front sinks
Trimming before countertop installation.
Wait until the big elements are installed. Trim and tiling should be LAST.
Tiling before countertop installation. If I need to shim the counters a lot, this will upset the parallel look with the tile/countertop line. Tile down to the countertop.
Trim pieces or that make countertop installation impossible. Remove them.
Angles that make countertop installation impossible (skinny in front and fat in rear)
Templating Arcs.
We need 3 points to define an Arc.
Either draw us a coordinate system, or make a physical template that has an “X” for each of the Arc defining points. Our computerized software will interpolate these points and create a perfect arc for our Water Jet to follow.
Templating Hand-Drawn Shapes
We are able to take a simple drawing, and scale it up with a terrific software.
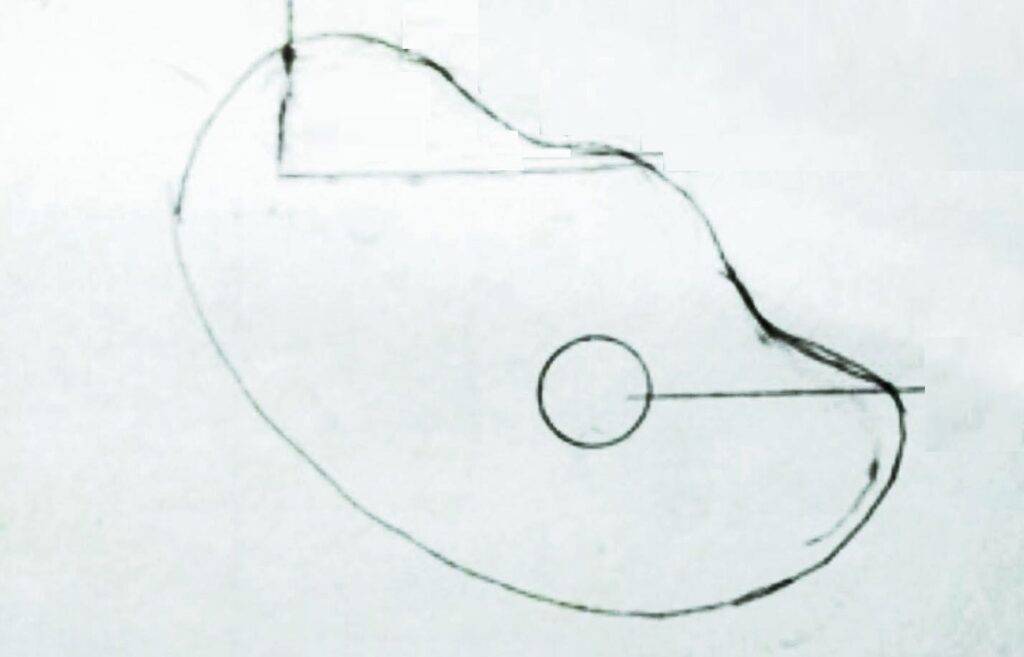
Hand Drawn countertop shape
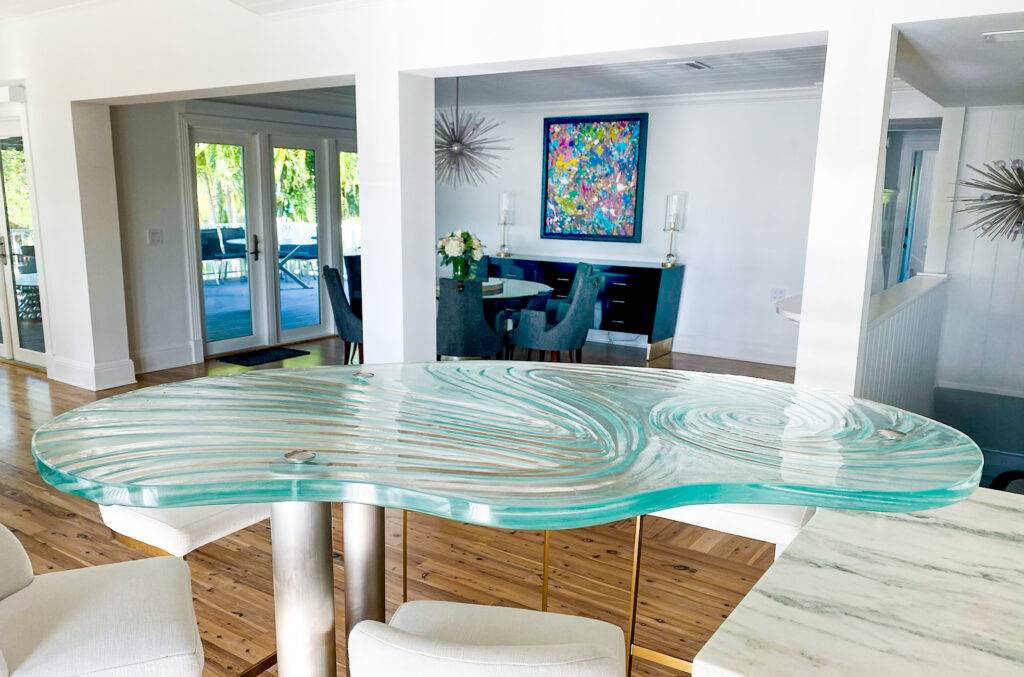
Final Result of Hand Drawn shape in Glass Countertop
The example above was the original sketch brought to us by our client Freida. We scaled it to the requested size, waterjetted a full-size cardboard mockup, and shared it with her. She was able to live with this piece in her kitchen for a few days, walking around it, living with it, in order to empirically understand that it was neither too big nor too small for her kitchen. This allowed us to move forward confidently. We used the mockup to carve our kiln sand bed outline, and then dramatically cut the sand bed to create the exact effect she desired. Having the client present was also a great way to ensure that every last detail that she desired was executed. The result is spectacular. During our early morning installation, we had just placed the glass piece atop its pillars…and the sunlight beamed in to illuminate the surface. Its fair to say the moment was very emotional to see her piece literally come alive.
As ever, call us at (813) 784 5211 to discuss your template needs.
Jeff Downing
Jeff@DowningDesigns.com

